Headless Craft CMS with GraphQL and React, Part 1: Configuring GraphQL in Craft
November 4, 2025
This tutorial is designed for Craft CMS developers who are looking to dip their toe into headless CMS development. I wanted to use a familiar website setup you might build in the real world, which I think is much easier to wrap your head around than, say, a random to-do list UI floating in a contextless sandbox environment.
We're going to walk through setting up a simple recipe website using a React framework for the front-end and Craft CMS in headless mode for the back-end, and we'll use GraphQL to connect the two together. This tutorial assumes you are comfortable coding with both React and Craft CMS, but no experience with GraphQL is necessary.
For this tutorial I'll be using the Next.js React framework, but this technique will work inside most React projects. If you're following along with Next.js, note that I am using the pages router.
Tech Stack:
- Craft CMS 5.8.18
- Next.js 15.5.5 - Pages Router
- React 19.1.0
- Apollo Client 4.0.7
CMS Structure:
Here's a breakdown of the basic Craft install:
- A channel named "Recipes" with a single entry type named "Recipe"
- A table field for ingredients
- A CKEditor field for instructions
- An Assets field for a recipe image
- A category group named "Dietary Restrictions" which we'll use to filter our recipe listing on the front-end
Enable Headless Mode in Craft
Since we're using a React framework to manage our frontend there's no need for Craft to serve content via templates. Enabling "Headless Mode" will tell Craft to respond to all requests with JSON responses instead of HTML ones, which will prevent content being accidentally accessed or indexed publicly. It also speeds up Craft's responses since it doesn't need to do any template routing.
Open up your config/general.php file and add the following code:
return GeneralConfig::create()
    ->headlessMode(true) // <-- add this
    //...
;
Create a GraphQL Schema
A schema is essentially a menu of items in Craft that our front-end site is allowed to access. Data can be queried (read) or mutated (changed).
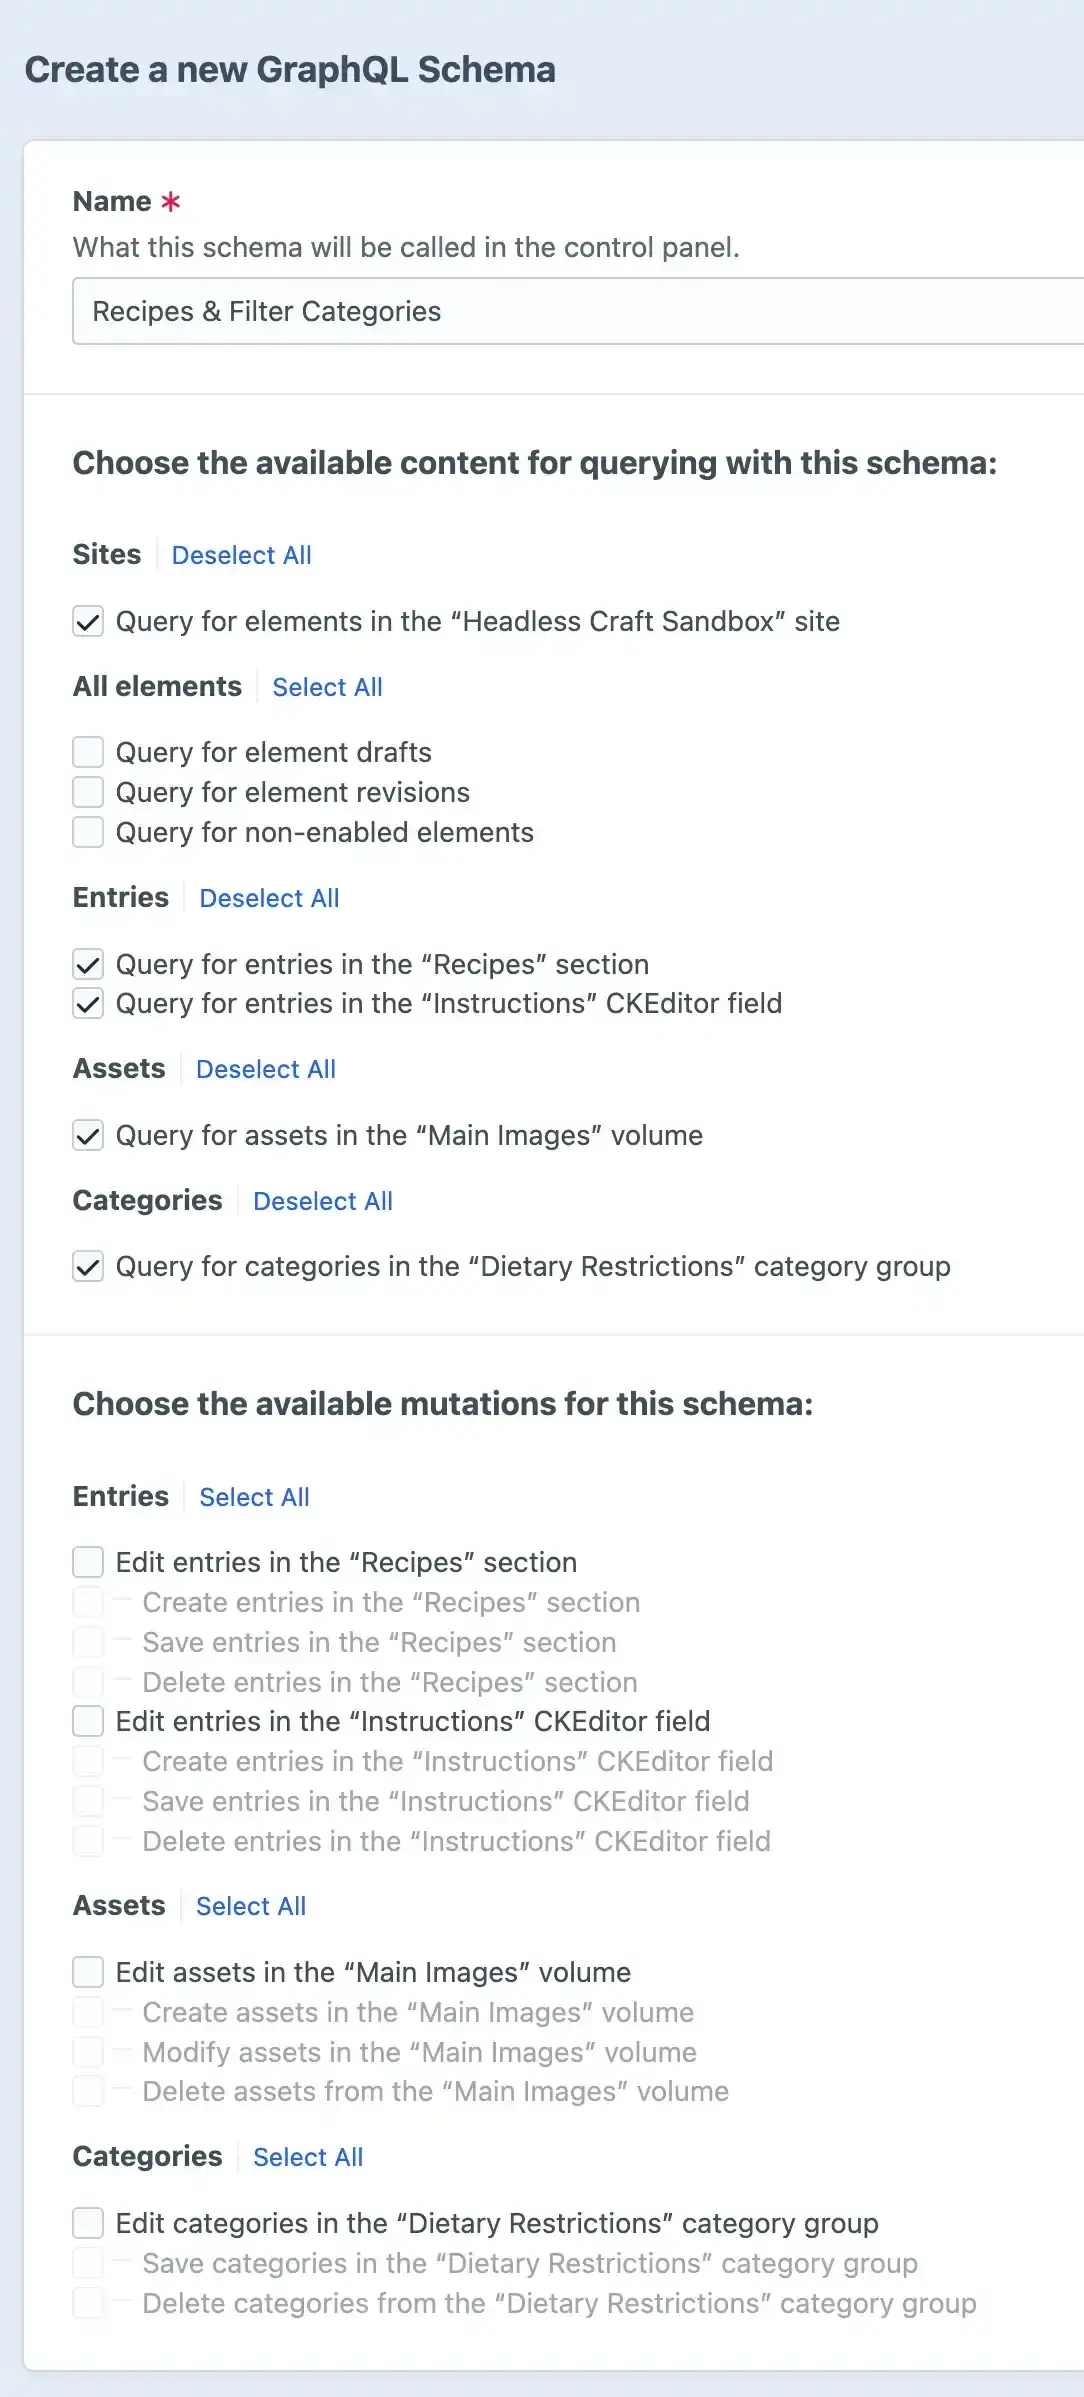
In the Craft control panel sidebar go to GraphQL > Schemas and click the "New Schema" button. Name it "Recipes & Filter Categories" with the following selections:
- Allow querying from the site
- We do not not want our front-end to be able to access drafts, revisions, or disabled elements, so leave those boxes unchecked
- We need to query our recipe entries and the CKEditor field entries where the instructions are stored, so check both boxes
- We need to query the image assets for each recipe, so check the box for that assets volume
- We need to query our filter categories, so check the box for that category group
- We do not need to edit (mutate) any of our content from the front-end, so leave all boxes under the mutations section unchecked.
Generate a GraphQL Token
In a traditional REST API, each batch of content is typically stored at a unique URL (aka "endpoint") like /recipes.json and /filter-categories.json. In GraphQL all of our data is accessed from a single endpoint and we use a token to tell GraphQL which schema we want to access.
In your Craft control panel sidebar go to GraphQL > Tokens and click the "New Token" button. You want to name your token after who or what is accessing the data, that way you can easily revoke access for a particular group without disrupting access for everyone.
Because our site is read-only we just need a single token to give our Next.js app (or whatever framework you're using) permission to query for recipe and category data. So we'll name the token "Next.js App", select the "Recipes & Filter Categories" schema we just created, and click "Save". We'll use this token later when we set up our request on the front-end.
And that's all there is to configuring Craft to receive GraphQL requests! In the next tutorial we'll get our front-end ready to send requests to Craft.